
Creating a Workspace
A Workspace is the first thing you create after signing in. It serves as the top-level container for all your projects and team members.
How to create a workspace
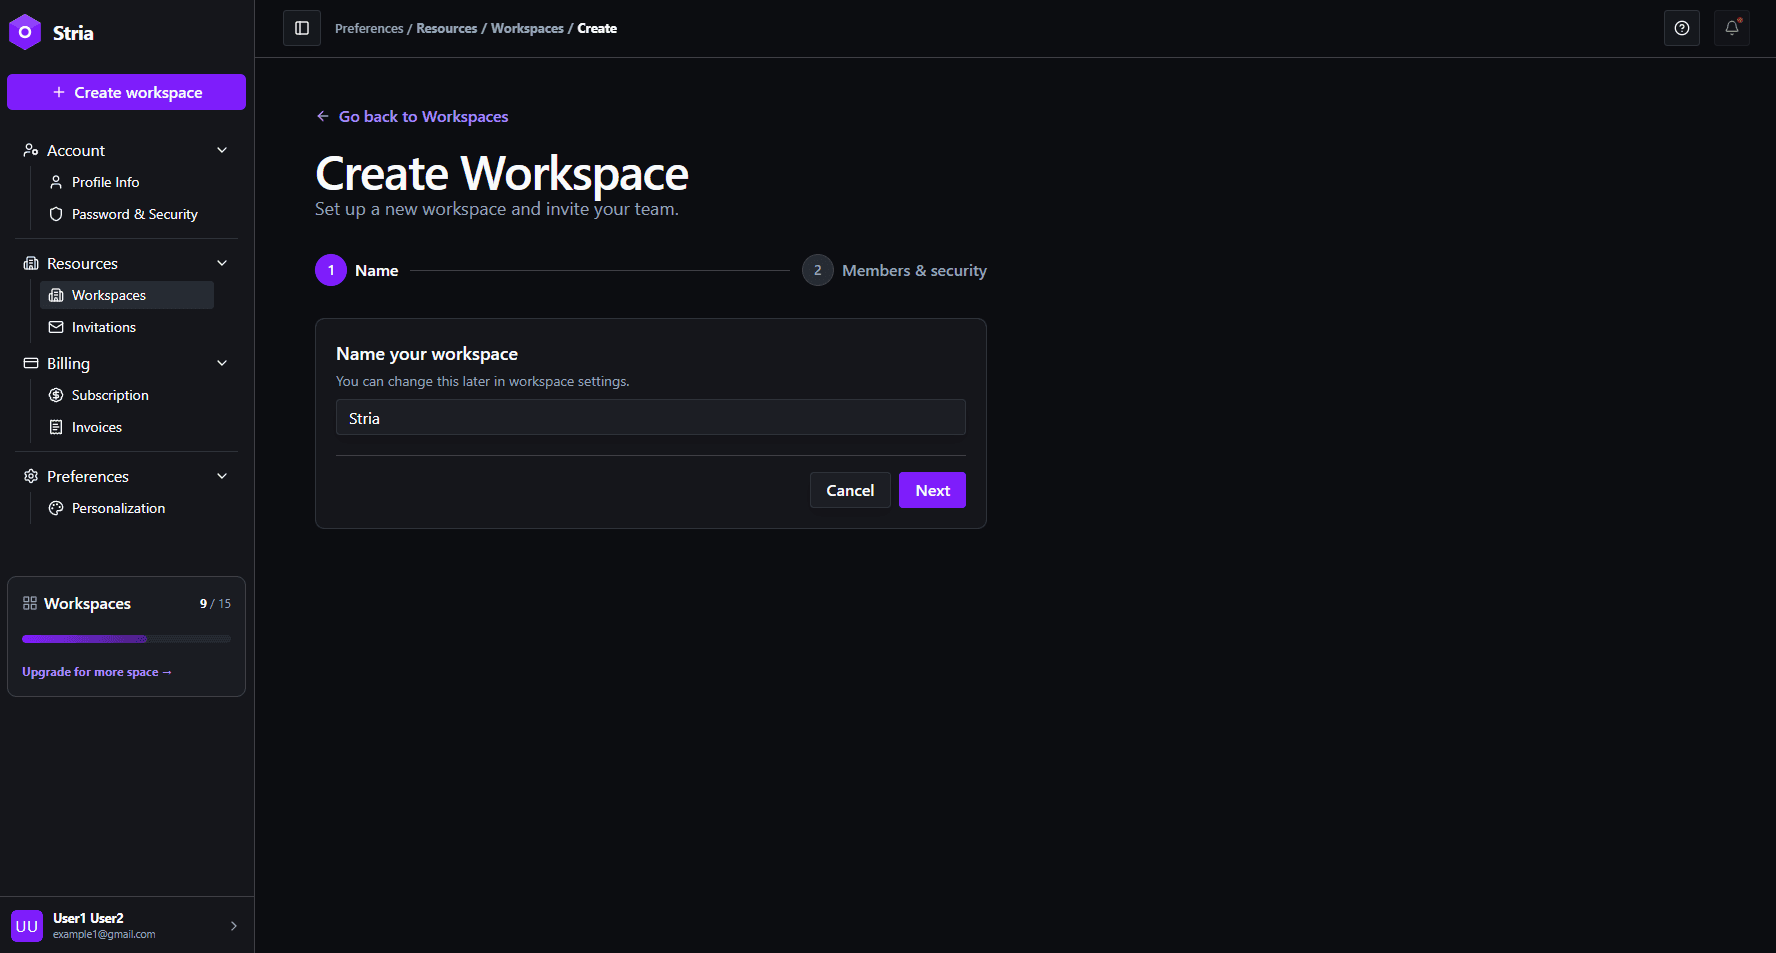
- From the workspaces page, click the New Workspace button.
- Enter a name for your workspace. Choose something descriptive, then click Next
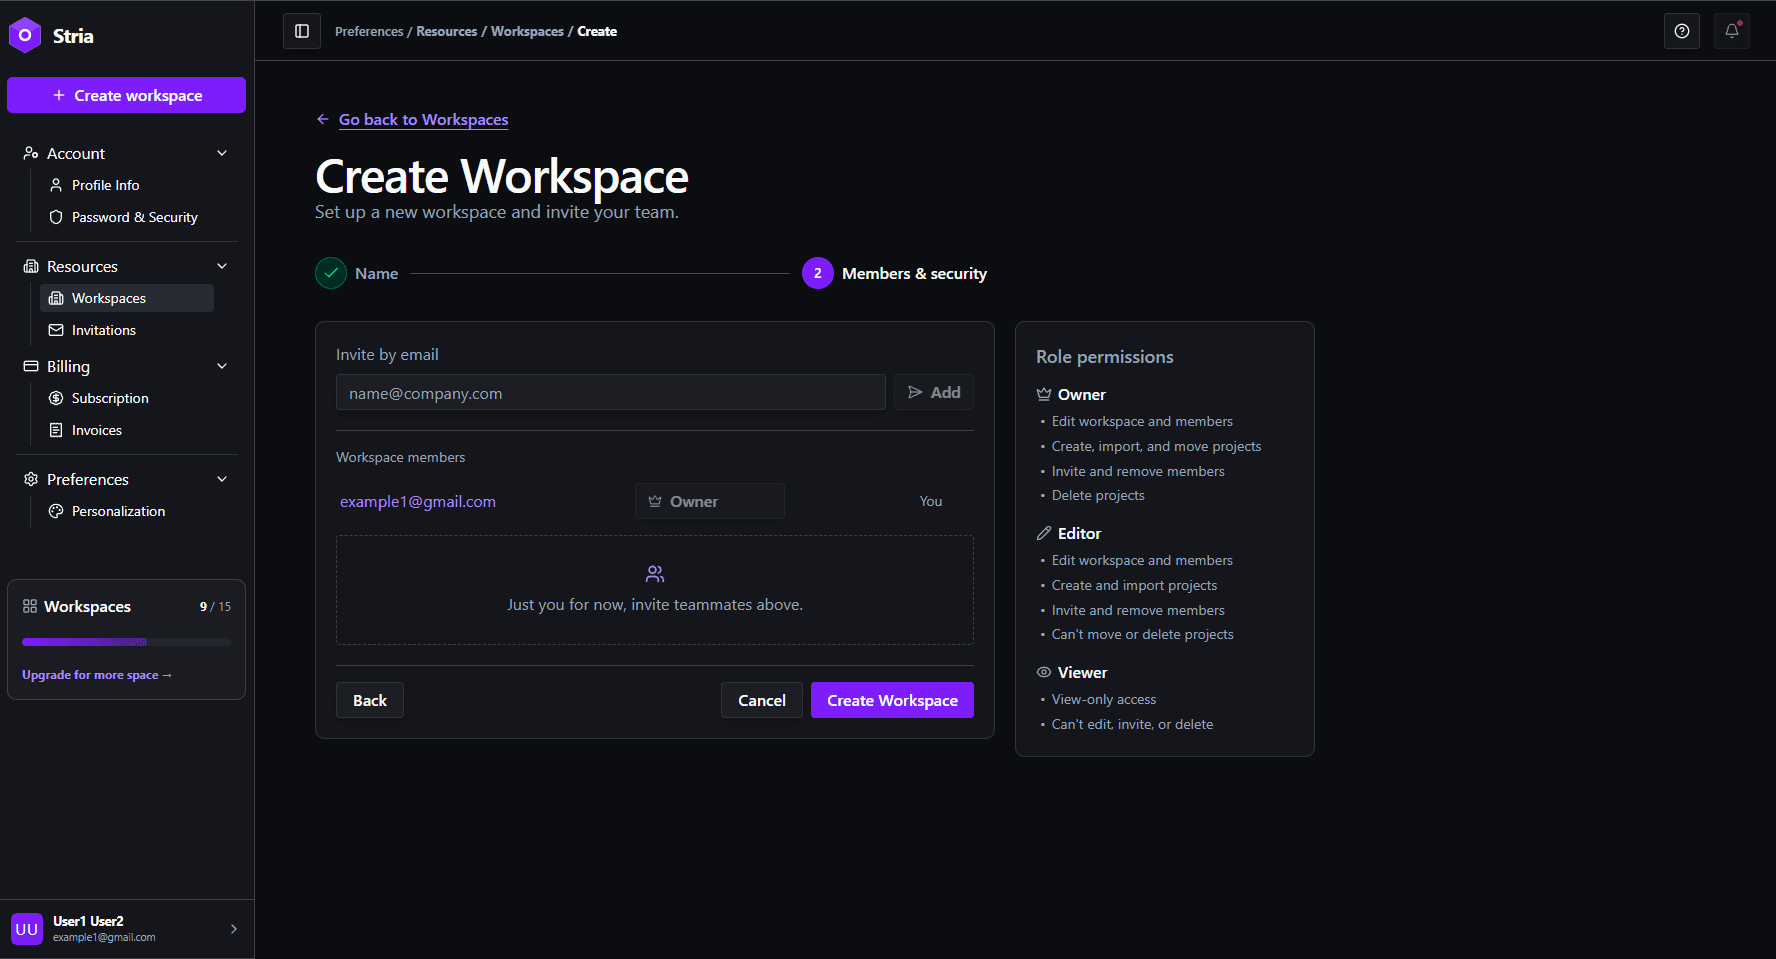
- (Optional) Invite team members by entering their email addresses.
- Click Create Workspace to finish.
Invite members (optional)
After clicking Next, you'll move to the second step where you can invite teammates to your workspace. Enter one or more email addresses, or skip this step if you'd rather invite members later.
Naming tips
- Use a name that reflects the team, department, or purpose (e.g. “Engineering”, “Product Docs”).
- You can rename a workspace later from its settings.
- Workspace names do not need to be unique across the platform, only within your own account.
When you're ready, click Create Workspace to complete the setup. You can always invite additional members later from the workspace settings.
What happens next
After creating a workspace, you are the owner. As the owner, you can:
- Create and manage projects within the workspace
- Invite or remove members
- Transfer ownership to another member
- Delete the workspace when it is no longer needed